Material Design Login Form Using jQuery And CSS
Last Updated : Jul 1, 2023
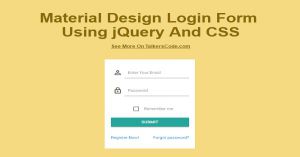
In this tutorial we will show you how to create a simple login form using material design, Material design is created and designed by Google it is used to give cool animations and responsiveness to a webpage it acts like a template you just have to specify class name and rest of the things will be handle by material design JS and CSS file.
Material design consists of Animation, Shadows, 3D Effects, Motion Visualization, Inbuilt Components, Responsive, CSS Transitions, Color Palettes and Patterns like Gesture, Touch Screen, Fingerprint and swipe to refresh etc.
You may also like login form with shake animation using jQuery.

CHECK OUT THIS TUTORIAL LIVE DEMO →
To Material Design Login Form It Takes Only Two Steps:-
- Make a HTML file and define markup and scripting
- Make a CSS file and define styling
Step 1. Make a HTML file and define markup and scripting
We make a HTML file and save it with a name login.html
<html>
<head>
<link rel="stylesheet" href="https://cdnjs.cloudflare.com/ajax/libs/materialize/0.97.1/css/materialize.min.css">
<link href="login_style.css" type="text/css" rel="stylesheet"/>
<script type="text/javascript" src="jquery.js"></script>
<script src="https://cdnjs.cloudflare.com/ajax/libs/materialize/0.97.1/js/materialize.min.js"></script>
</head>
<body>
<div id="wrapper">

<div id="login_div">
<form method="post">

<div class="input-field">
<i class="mdi-social-person-outline prefix"></i>
<input class="validate" id="email" type="email">
<label for="email" data-error="wrong" data-success="right" class="center-align">Enter Your Email</label>
</div>

<div class="input-field">
<i class="mdi-action-lock-outline prefix"></i>
<input id="password" type="password">
<label for="password">Password</label>
</div>

<div class="input-field">
<input type="checkbox" id="remember-me"/>
<label for="remember-me">Remember me</label>
</div>

<div class="input-field">
<button class="btn waves-effect waves-light" type="submit" name="action">Submit</button>
</div>

<p>
<a href="#" id="register">Register Now!</a>
<a href="#" id="forgot">Forgot password?</a>
</p>

<br>
<br>
</form>
</div>

</div>
</body>
</html>
In this step we create simple markup to create a login form and to add animations and
effects we add class to our markups according to the material design.
You must have to use .input-field div wrapping your input and label to display animation in input.
You can view all the animations and other components of material design in materializecss.com
Step 2. Make a CSS file and define styling
We make a CSS file and save it with a name login_style.css
body
{
 text-align:center;
 width:100%;
 margin:0 auto;
 padding:0px;
 background-color:#21610B;
}
#wrapper
{
 margin:0 auto;
 padding:0px;
 text-align:center;
 width:995px;
}
#login_div
{
 background-color:white;
 padding:20px;
 max-width:300px;
 margin-left:345px;
}
#login_div button
{
 margin-top:20px;
 height:40px;
 width:100%;
}
#login_div #register
{
 margin-top:20px;
 float:left;
}
#login_div #forgot
{
 margin-top:20px;
 float:right;
}
That's all, this is how to create material design login form using jQuery and CSS. You can customize this code further as per your requirement. And please feel free to give comments on this tutorial.
I hope this tutorial on material design form using jquery and css helps you and the steps and method mentioned above are easy to follow and implement.


