


Move Elements On Page Scroll Using jQuery And CSS
Last Updated : Jul 1, 2023
In this tutorial we will show you how to move elements on page scroll using jQuery and CSS, in this modern web development age everyday there is something new happens and one of these new thing is Page Scroll Animation.
In this web design elements move slowly and change their positions with animations as user starts to scroll the webpage.
You may also like Simple Parallax Effect On Scrolling Using jQuery And CSS
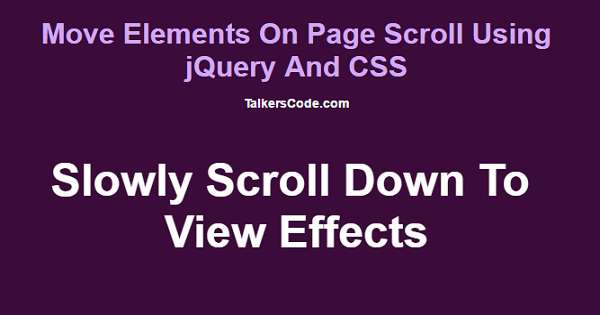
CHECK OUT THIS TUTORIAL LIVE DEMO →
To Move Elements On Page Scroll It Takes Only Three Steps:-
- Make a HTML file and define markup
- Make a js file and define scripting
- Make a CSS file and define styling
Step 1. Make a HTML file and define markup
We make a HTML file and save it with a name page.html
<html>
<head>
<script type="text/javascript" src="jquery.js"></script>
<script type="text/javascript" src="page_script.js"></script>
<link rel="stylesheet" type="text/css" href="page_style.css">
</head>
<body>
<div id="wrapper">

<div id="header_div">
<p class='effect_label'>Slowly Scroll Down To View Effects</p>
</div>

<div class="float_div" id="left_right_div">
<h2>DIV 1</h2>
<p>
Place Your Div Content Here
</p>
</div>
<img src="images/image1.jpg" id="right_left_img">


<div class="float_div" id="fade_div">
<h2>DIV 2</h2>
<p>
Place Your Div Content Here
</p>
</div>
<img src="images/image2.jpg" id="fade_img">


<div class="float_div" id="slide_div">
<h2>DIV 3</h2>
<p>
Place Your Div Content Here
</p>
</div>
<img src="images/image3.jpg" id="slide_img">

</div>
</body>
</html>
In this step we made three divs and insert 3 images to display 3 different animation on page scroll and insert our jQuery and our js and css file which we were going to make on next steps. You may also like Page Scroll To Top Using jQuery
Step 2. Make a js file and define scripting
We make a js file and save it with a name page_script.js
$(document).ready(function(){
 $(window).scroll(function(){
 if ($(window).scrollTop() > 100)
 {
  $("#left_right_div").animate({marginLeft:'100px'},900);
  $("#right_left_img").animate({marginRight:'100px'},900);
 }
 if ($(window).scrollTop() > 700)
 {
  $("#fade_div").fadeIn(2000);
  $("#fade_img").fadeIn(2000);
 }
 if ($(window).scrollTop() > 1300)
 {
  $("#slide_div").slideDown(500);
  $("#slide_img").slideDown(500);
 }
 });
});
In this step we use window.scroll function to display element animations on certain height. $(window).scrollTop() is used to get the distance between windows top and user scrollbar position.
In first if condition we check if scroll height is greater than 100 then display the first div and image, in second condition we check if scroll height is greater than 700 then display 2nd div and image with jQuery fadeIn effect and in 3rd if condition we check if the scroll height
is greater than 1300 then we display our 3rd div and image with jQuery slideDown effect.
Step 3. Make a CSS file and define styling
We make a CSS file and save it with a name page_style.css
body
{
 width:100%;
 margin:0 auto;
 padding:0px;
 background-color:#3B0B39;
 font-family:helvetica;
 height:300%;
}
#wrapper
{
 text-align:center;
 margin:0 auto;
 padding:0px;
 width:995px;
 overflow:hidden;
}
#header_div
{
 border-bottom:5px solid #D0A9F5;
 height:400px;
}
#header_div .effect_label
{
 font-size:50px;
 font-weight:bold;
 color:white;
}

#wrapper .float_div
{
 clear:both;
 float:left;
 width:350px;
 height:300px;
 padding:10px;
 box-sizing:border-box;
 margin-top:100px;
 background-color:#D0A9F5;
 color:#3B0B39;
 box-shadow:0px 0px 20px 0px #8A0886;
 margin-bottom:100px;
}
#wrapper .float_div h2
{
 font-size:30px;
}
img
{
 float:right;
 width:350px;
 height:300px;
 margin-top:100px;
 box-shadow:0px 0px 20px 0px #8A0886;
}
#left_right_div
{
 margin-left:-500px;
}
#right_left_img
{
 margin-right:-500px;
}
#fade_div
{
 margin-left:100px;
 display:none;
}
#fade_img
{
 margin-right:100px;
 display:none;
}
#slide_div
{
 margin-left:100px;
 display:none;
}
#slide_img
{
 margin-right:100px;
 display:none;
}
Thats all, this is how to pause and resume slideShow using jQuery and CSS. You can customize this code further as per your requirement. And please feel free to give comments on this tutorial.
I hope this tutorial on pause and resume slideShow using jQuery and CSS helps you and the steps and method mentioned above are easy to follow and implement.
 About Dikshita
Passionate Electronics and Communication Engineering student with expertise in web development (HTML, CSS, JS,PHP, Bootstrap, React.js) and content writing. Eager problem solver and tech enthusiast, adept at creating engaging web experiences.
RELATED TUTORIALS
 Move Elements On Page Scroll Using jQuery And CSS
 Page Scroll To Top Using jQuery
 Load Results From Database On Page Scroll Using jQuery,Ajax And PHP
 Change The Design Of All Elements In A WebPage Using JavaScript And CSS
 Auto Scrolling Page Using jQuery
 One Page Website Template Using HTML, CSS And jQuery
 Display Progress Bar While Page Loads Using jQuery
 Submit The Form Without Page Refresh Using Ajax And jQuery
 Change Browser URL Without Refreshing Page Using jQuery And HTML5
 Upload Image Without Page Refresh Using Ajax,jQuery And PHP