


Drag And Drop Shopping Cart Using jQuery,Ajax And PHP
Last Updated : Jul 1, 2023
In this tutorial we will show you how to add items in shopping cart using drag and drop feature by using jQuery,Ajax and PHP.
Drag And Drop is the modern and easy way to add items in shopping cart you only have to drag an item and drop it into the cart and the items will automatically added in your cart.
You may also like add to cart system using ajax And PHP.

CHECK OUT THIS TUTORIAL LIVE DEMO →
To Create Drag And Drop Shopping Cart It Takes Only Four Steps:-
- Make a PHP file and define markup and scripting
- Make a js file and define scripting
- Make a PHP file to store items in cart
- Make a CSS file and define styling
Step 1. Make a PHP file and define markup and scripting
We make a PHP file and save it with a name cart.php
<html>
<head>
 <link href="cart.css" rel="stylesheet" type="text/css"/>
 <script type="text/javascript" src="jquery.js"></script>
 <script type="text/javascript" src="jquery-ui.js"></script>
 <script type="text/javascript" src="cart.js"></script>
 </head>
<body>
<div id="wrapper">

<div id="item_div">

<div class="items" id="item1">
 <img src="images/product1.jpg">
 <p>Simple Navy Blue T-Shirt</p>
 <p>Price - $95</p>
 <input type="hidden" id="item1_name" value="Simple Navy Blue T-Shirt">
 <input type="hidden" id="item1_price" value="$95">
</div>

<div class="items" id="item2">
 <img src="images/product2.jpg">
 <p>Trendy T-Shirt With Back Design</p>
 <p>Price - $105</p>
 <input type="hidden" id="item2_name" value="Trendy T-Shirt With Back Design">
 <input type="hidden" id="item2_price" value="$105">
</div>

<div class="items" id="item3">
 <img src="images/product3.jpg">
 <p>Two Color Half-Sleeves T-Shirt</p>
 <p>Price - $120</p>
 <input type="hidden" id="item3_name" value="Two Color Half-Sleeves T-Shirt">
 <input type="hidden" id="item3_price" value="$120">
</div>

</div>

<div id="cart_label_div">
 <p id="cart_label" onclick="show_cart();"><?php echo count($_SESSION['items']);?> Items In Your Cart</p>
</div>

<div id="mycart">
<?php
 if($_SESSION['items'])
 {
  for($i=0;$i<count($_SESSION['items']);$i++)
  {
   $item_val=explode("+",$_SESSION['items'][$i]);
   ?>
   <div class='cart_items'>
    <img src='<?php echo $item_val[2];?>'>
    <p><?php echo $item_val[0];?></p>
    <p><?php echo $item_val[1];?></p>
    <input type='button' value='Remove Item' onclick='remove_item("<?php echo $_SESSION['items'][$i];?>");'>
   </div>
   <?php
  }
 }
 else
 {
  echo "<p id='mycart_label'>Drop Items Here</p>";
 }
?>
</div>

</div>
</body>
</html>
In this step we first create three sample products for working with shopping cart. Then we create a div to display the items which are in shopping cart and this is also the same div where user drop there desired
item to shopping cart.
And we add all the required files for shopping cart like jquery.js, jquery-ui.js and we were going to create cart.js and cart.css in next steps.
You have to download jquery-ui.js file for drag and drop feature.
Step 2. Make a js file and define scripting
We make a js file and save it with a name cart.js
$(document).ready(function()
{
 $( ".items" ).draggable
 ({
  containment: 'document',
  opacity: 0.6,
  revert: 'invalid',
  helper: 'clone',
  zIndex: 100
 });

 $("#mycart").droppable({
  drop:function(e, ui)
  {
   var param = $(ui.draggable).attr('id');
   cart(param);
  }
 });
});

function cart(id)
{
 var ele=document.getElementById(id);
 var img_src=ele.getElementsByTagName("img")[0].src;
 var name=document.getElementById(id+"_name").value;
 var price=document.getElementById(id+"_price").value;

 $.ajax
 ({
  type:'post',
  url:'store_item.php',
  data:{
   item_src:img_src,
   item_name:name,
   item_price:price
  },
  success:function(response) {
   if(response)
   {
    document.getElementById("cart_label").innerHTML=response;
    show_cart();
   }
  }
 });
}

function remove_item(item_val)
{
 $.ajax({
  type:'post',
  url:'store_item.php',
  data:{
   remove_item:'remove_item',
   item_val:item_val
  },
  success:function(response) {
   document.getElementById("cart_label").innerHTML=response;
   show_cart();
  }
 });
}

function show_cart()
{
 $.ajax({
  type:'post',
  url:'store_item.php',
  data:{
   show_cart:'show_cart',
  },
  success:function(response) {
   document.getElementById("mycart").innerHTML=response;
  }
 });
}
In this step we first make all our products draggable. draggable() function is used to make products draggable and droppable() function is used to get product id and call cart() function with product id when
user drop the product in cart area.
In cart() function we get product related all the values and send it to store_item.php file to store product in shopping cart and if product stored successfully then it call show_cart() function.
You may also like drag and drop image upload using jQuery and PHP.
In show_cart() function we simply display our cart products in 'mycart' div.
And in remove_item() function we simple get product values and remove that item from cart and call show_cart() function to display the remaining products on cart.
Step 3. Make a PHP file to store items in cart
We make a PHP file and save it with a name store_item.php
<?php
session_start();

if(isset($_POST['item_src']))
{
 $item_values=$_POST['item_name']."+".$_POST['item_price']."+".$_POST['item_src'];
 if(count($_SESSION['items'])>0)
 {
  if(in_array($item_values,$_SESSION['items']))
  {
  }
  else
  {
   $_SESSION['items'][]=$item_values;
  }
 }
 else
 {
  $_SESSION['items'][]=$item_values;
 }
 echo count($_SESSION['items'])." Items In Your Cart";
 exit();
}

if(isset($_POST['show_cart']))
{
 for($i=0;$i<count($_SESSION['items']);$i++)
 {
  $item_val=explode("+",$_SESSION['items'][$i]);
  ?>
  <div class='cart_items'>
   <img src='<?php echo $item_val[2];?>'>
   <p><?php echo $item_val[0];?></p>
   <p><?php echo $item_val[1];?></p>
   <input type='button' value='Remove Item' onclick='remove_item("<?php echo $_SESSION['items'][$i];?>");'>
  </div>
  <?php
 }
 exit();
}

if(isset($_POST['remove_item']))
{
 $item_val=$_POST['item_val'];
 for($i=0;$i<count($_SESSION['items']);$i++)
 {
  if($_SESSION['items'][$i]==$item_val)
  {
   unset($_SESSION['items'][$i]);
  }
 }
 $_SESSION['items']=array_values($_SESSION['items']);
 echo count($_SESSION['items'])." Items In Your Cart";
 exit();
}
?>
In this step we create three isset() conditions to store, display and remove products.
In first condition we store the products in shopping cart we use php sessions to store products in cart we get all the details of dropped product and then we use '+' sign to seperate the values and store in session array.
In second isset() condition we display products available in cart by using for loop() and explode function to loop on session array and then use explode to seperate values from '+' sign and then displaying.
In third isset() function we get the removing product details and we simply remove that product from cart using unset() function.
You can view our zoom image using jQuery tutorial to add zoom functionality on products.
Step 4. Make a CSS file and define styling
We make a CSS file and save it with a name cart.css
body
{
 text-align:center;
 width:100%;
 margin:0 auto;
 padding:0px;
 font-family:helvetica;
}
#wrapper
{
 text-align:center;
 margin:0 auto;
 padding:0px;
 width:995px;
}
#item_div
{
 float:left;
 background-color:#E6E6E6;
 margin-left:180px;
 text-align:center;
 padding:20px;
 box-sizing:border-box;
}
.items
{
 float:left;
 padding:10px;
 background-color:white;
 width:150px;
 height:240px;
 margin-top:20px;
 box-shadow:0px 0px 10px 0px #A4A4A4;
 box-sizing:border-box;
 margin:20px;
}
.items img
{
 width:130px;
}
.items p
{
 margin:5px;
 font-size:14px;
 color: green;
}
#cart_label_div
{
 clear:both;
 float:left;
 text-align:center;
 width:610px;
 margin-left:180px;
 margin-top:40px;
 background-color:#E6E6E6;
}
#cart_label_div p
{
 margin:10px;
 color:#585858;
 font-size:20px;
 font-weight:bold;
}
#mycart
{
 clear:both;
 float:left;
 width:604px;
 min-height:200px;
 margin-left:180px;
 border:3px dashed #585858;
}
#mycart #mycart_label
{
 font-size:25px;
 color:#585858;
 font-weight:bold;
}
#mycart .cart_items
{
 border-bottom:1px dashed silver;
 padding:20px;
 padding-left:10px;
 text-align:left;
}
#mycart .cart_items img
{
 width:70px;
 height:50px;
 float:left;
 margin-right:10px;
}
#mycart .cart_items p
{
 margin:0px;
 font-size:15px;
 color:green;
}
Thats all, this is how drag and drop shopping cart using jQuery, Ajax and PHP. You can customize this code further as per your requirement. And please feel free to give comments on this tutorial.
I hope this tutorial on drag and drop add to cart helps you and the steps and method mentioned above are easy to follow and implement.
 About Amruta
Amruta is an Experienced web developer with 4 years for experience she completed her master's with MCA and passionate about programming Languages for creating technical contents like HTML, CSS, JavaScript, Java, Python, PHP, jQuery.
RELATED TUTORIALS
 Drag And Drop Shopping Cart Using jQuery,Ajax And PHP
 Drag And Drop Image Upload Using jQuery Ajax And PHP
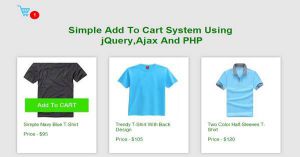 Simple Add To Cart System Using jQuery,Ajax And PHP
 Dynamic Drop Down Menu Using jQuery, Ajax, PHP And MySQL
 Ajax Pagination Using jQuery, PHP And MySQL
 Ajax Login Form Using jQuery, PHP And MySQL
 Extract URL Data Like Facebook Using PHP,jQuery And Ajax
 Ajax Contact Form Using jQuery, PHP And MySQL
 Add, Edit And Delete Records Using jQuery, Ajax, PHP And MySQL
 Submit The Form Without Page Refresh Using Ajax And jQuery