


File Upload Progress Bar Using jQuery And PHP
Last Updated : Jul 1, 2023
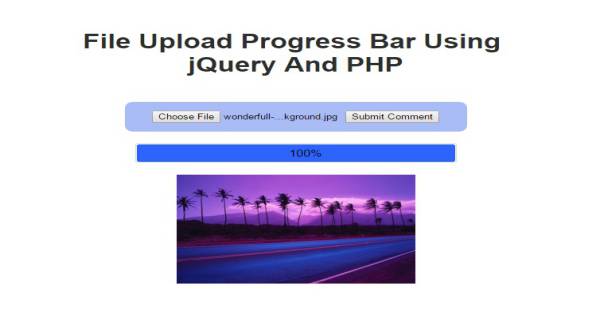
In this tutorial we will create file upload progress bar using jquery and php Progress Bar is used to display the progress of file upload process.Its very helpful and widely used in file upload process just to give user about progress of file upload.
You may also like Drag And Drop Image Upload Using jQuery
CHECK OUT THIS TUTORIAL LIVE DEMO →
To Create File Upload Progress Bar it takes only four steps:-
- Make a HTML file and define markup for file upload
- Make a JavaScript file and define script for Progress Bar
- Make a PHP file to upload the image
- Make a CSS file and define styling for Progress Bar
Step 1. Make a HTML file and define markup for file upload
We make a HTML file and save it with a name fileupload.html
<html>
<head>
  <link rel="stylesheet" type="text/css" href="progress_style.css">
  <script type="text/javascript" src="jquery.js"></script>
  <script type="text/javascript" src="jquery.form.js"></script>
  <script type="text/javascript" src="upload_progress.js"></script>
</head>
<body>
<form action="upload_file.php"id="myForm" name="frmupload" method="post" enctype="multipart/form-data">
  <input type="file" id="upload_file" name="upload_file" />
  <input type="submit" name='submit_image' value="Submit Comment" onclick='upload_image();'/>
</form>
<div class='progress' id="progress_div">
<div class='bar' id='bar1'></div>
<div class='percent' id='percent1'>0%</div>
</div>
<div id='output_image'>
</body>
</html>
In this step we make a form to upload file and attach all the necessary files but before you proceed further you have to download jQuery and jQuery Form Plugin
Step 2. Make a JavaScript file and define script for Progress Bar
We make a JavaScript file and save it with name upload_progress.js
function upload_image()
{
  var bar = $('#bar');
  var percent = $('#percent');
  $('#myForm').ajaxForm({
    beforeSubmit: function() {
      document.getElementById("progress_div").style.display="block";
      var percentVal = '0%';
      bar.width(percentVal)
      percent.html(percentVal);
    },

    uploadProgress: function(event, position, total, percentComplete) {
      var percentVal = percentComplete + '%';
      bar.width(percentVal)
      percent.html(percentVal);
    },

	success: function() {
      var percentVal = '100%';
      bar.width(percentVal)
      percent.html(percentVal);
    },

    complete: function(xhr) {
      if(xhr.responseText)
      {
        document.getElementById("output_image").innerHTML=xhr.responseText;
      }
    }
  });
}
In this step we use ajaxForm to upload and show the progress bar.jQuery Form Plugin has predefined
functions to upload and display the progress bar.
In first function we initialise the progress bar width and % and set the styling.In second function it increase the % and width of the bar as file uploads slowly slowly.In third function if file upload successfully then set the % to 100 and increase the bar width.
In fourth function if the whole file upload process completes with no error then it displays the file.For more information about jQuery form functions.
Step 3. Make a PHP file to upload the image
We make a PHP file and save it with name upload_file.php
if(isset($_POST['submit_image']))
{
  $uploadfile=$_FILES["upload_file"]["tmp_name"];
  $folder="images/";
  move_uploaded_file($_FILES["upload_file"]["tmp_name"], $folder.$_FILES["upload_file"]["name"]);
  echo '<img src="'.$folder."".$_FILES["upload_file"]["name"].'">';
  exit();
}
In this step we get and upload file to folder and send the file to javascript upload file for display. n this step we except only images to upload you can customise further as per your need.
You can also view How to Upload Images to server or database
Step 4. Make a CSS file and define styling for progress bar
We make a CSS file and save it with name progress_style.css.
body
{
  padding: 30px
}
form
{
  display: block;
  margin: 20px auto;
  background: #eee;
  border-radius: 10px;
  padding: 15px
}
.progress
{
  display:none;
  position:relative;
  width:400px;
  border: 1px solid #ddd;
  padding: 1px;
  border-radius: 3px;
}
.bar
{
  background-color: #B4F5B4;
  width:0%;
  height:20px;
  border-radius: 3px;
}
.percent
{
  position:absolute;
  display:inline-block;
  top:3px;
  left:48%;
}
You can view our get file size and extension before uploading using jQuery tutorial to validate files before uploading. Thats all, this is how to Create File Upload Progress Bar Using jQuery and PHP.
You can customize this code further as per your requirement. And please feel free to give comments on this tutorial.
I hope this tutorial on File Upload Progress Bar helps you and the steps and method mentioned above are easy to follow and implement.
 About Pragati
Experienced coding content writer who enjoys breaking down complex concepts in programming languages like Java, Python, C, and C++. Over three years of experience producing interesting and relevant content for a variety of entities. Committed to providing concise and easy-to-understand articles that assist readers in easily understanding technology and industry trends in the world of coding and software development.
RELATED TUTORIALS
 File Upload Progress Bar Using jQuery And PHP
 Create Zip File After Upload Using PHP
 Animated Progress Bar Using jQuery And CSS
 Multistep Form With Progress Bar Using jQuery And CSS
 Display Progress Bar While Page Loads Using jQuery
 Remove File Extensions Using Htaccess File
 Upload Image Without Page Refresh Using Ajax,jQuery And PHP
 Drag And Drop Image Upload Using jQuery Ajax And PHP
 Upload Multiple Images With Image Preview Using jQuery,Ajax And PHP
 Upload Image From URL Using PHP