


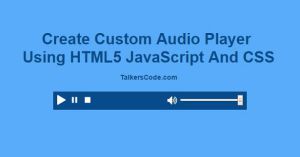
Create Custom Audio Player Using HTML5 And JavaScript
Last Updated : Jul 1, 2023
IN - HTML5 JavaScript CSS | Written & Updated By - Ashish
In this tutorial we will show you how to create custom audio player using HTML5 and JavaScript. By creating this you can play music with your style and there is no need to use browser default audio player.
You may also like create HTML5 video player using JavaScript.

CHECK OUT THIS TUTORIAL LIVE DEMO →
To Create Custom Audio Player It Takes Only Three Steps:-
- Make a HTML file and define markup
- Make a js file and define scripting
- Make a CSS file and define styling
Step 1. Make a HTML file and define markup
We make a HTML file and save it with a name player.html
<html>
<head>
<script type="text/javascript" src="player.js"></script>
<link rel="stylesheet" type="text/css" href="player.css">
</head>
<body>
<div id="wrapper">
<div id='player'>
<audio id="music_player">
<source src="music/sample_music.mp3"/>
</audio>
<input type="image" src="images/play.png" onclick="play_aud()" id="play_button">
<input type="image" src="images/pause.png" onclick="pause_aud()" id="play_button">
<input type="image" src="images/stop.png" onclick="stop_aud()" id="play_button">
<img src="images/volume.png" id="vol_img">
<input type="range" id="change_vol" onchange="change_vol()" step="0.05" min="0" max="1" value="1">
</div>
</div>
</body>
</html>
In this step we insert an audio file using HTML5 audio tag and create three buttons for play, pause
and stop and also created a range tag to adjust the volume of audio and we also insert our js and css file which we were going to create in next steps.
You may also like play sound on notification using JavaScript.
Step 2. Make a js file and define scripting
We make a js file and save it with a name player.js
document.addEventListener("DOMContentLoaded", function() { startplayer(); }, false);
var player;

function startplayer()
{
 player = document.getElementById('music_player');
 player.controls = false;
}

function play_aud()
{
 player.play();
}
function pause_aud()
{
 player.pause();
}
function stop_aud()
{
 player.pause();
 player.currentTime = 0;
}
function change_vol()
{
 player.volume=document.getElementById("change_vol").value;
}
In this step we create 5 functions for working with our audio player.
In startplayer() function we first initialise our player and set the browser default controls to false so that our custom functions will work and all the rest of the functions is used to play, pause, stop and change volume of the audio player.
Step 3. Make a CSS file and define styling
We make a CSS file and save it with a name player.css
body
{
 width:100%;
 margin:0 auto;
 padding:0px;
 font-family:helvetica;
 background-color:#58ACFA;
}
#wrapper
{
 text-align:center;
 margin:0 auto;
 padding:0px;
 width:995px;
}
#player
{
 background-color:#084B8A;
 width:400px;
 margin-left:300px;
 padding:5px;
 box-sizing:border-box;
}
input[type="image"]
{
 float:left;
 height:20px;
 margin-left:2px;
 margin-right:5px;
 margin-top:2px;
}
#vol_img
{
 margin-left:150px;
 width:20px;
}
Thats all, this is how to create custom audio player using HTML5 JavaScript and CSS. You can customize this code further as per your requirement. And please feel free to give comments on this tutorial.
I hope this tutorial on custom audio player helps you and the steps and method mentioned above are easy to follow and implement.
 About Ashish
Ashish is a dynamic and motivated individual with a passion of programming and an experienced programmer having 3+ years of experience in various languages like Java, Python, HTML, CSS, JavaScript, jQuery and various frameworks like Bootstrap
RELATED TUTORIALS
 Create Custom Audio Player Using HTML5 And JavaScript
 Create Your Own Custom Video Player Using HTML5 And JavaScript
 Create Your Own Custom Scrollbars Using CSS And HTML
 Take Screenshot Of A Webpage Using HTML5 And JavaScript
 Create Toggle Panel Using HTML5 And CSS
 Create Simple Image Editor Using jQuery, HTML5 And CSS
 Custom Error Page Using PHP
 Simple And Best Custom Popup Box Using jQuery And CSS
 Fullscreen Background Video Using HTML5 And CSS
 HTML5 Login And Signup Form With Animation Using jQuery